Practical Strategies for Optimizing Your Home Office Ergonomics: Reduce Strain by 20% in 30 Days
Practical Strategies for Optimizing Your Home Office Ergonomics: Reduce Strain by 20% in 30 Days
The shift to remote work has transformed the way millions of people approach their careers. While the flexibility and convenience of a home office are undeniable, they also come with a unique set of challenges, particularly concerning physical well-being. Many individuals find themselves grappling with increased neck pain, backaches, wrist discomfort, and eye strain – all symptoms of poor Home Office Ergonomics. These issues aren’t just minor annoyances; they can significantly impact productivity, mood, and long-term health. The good news is that with a targeted approach, you can significantly improve your ergonomic setup and reduce physical strain. This comprehensive guide will walk you through practical, actionable strategies designed to help you optimize your home office ergonomics and reduce strain by a remarkable 20% in just 30 days.
Imagine waking up without that nagging stiffness in your shoulders or enduring a full workday without the dull ache in your lower back. This isn’t a pipe dream; it’s an achievable reality with the right knowledge and consistent application. We’ll delve into everything from chair and desk selection to monitor placement, keyboard and mouse usage, lighting, and even the importance of movement and breaks. Our goal is to empower you with the tools and understanding to create a workspace that supports your body, enhances your focus, and contributes positively to your overall well-being. Let’s embark on this 30-day journey to a more comfortable, healthier, and more productive home office experience.
Understanding the Importance of Home Office Ergonomics
Before we dive into the ‘how-to,’ it’s crucial to understand ‘why.’ Ergonomics, at its core, is the science of designing and arranging workplaces so that people and things interact most efficiently and safely. In the context of your home office, this means configuring your environment to fit your body, rather than forcing your body to adapt to an ill-suited environment. Neglecting Home Office Ergonomics can lead to a cascade of problems:
- Musculoskeletal Disorders (MSDs): These include conditions like carpal tunnel syndrome, tendinitis, back pain, neck pain, and repetitive strain injuries (RSIs). They are often caused or aggravated by prolonged awkward postures, repetitive movements, and excessive force.
- Reduced Productivity: When you’re in pain or uncomfortable, your ability to concentrate diminishes. Frequent discomfort leads to distractions, more breaks (often unproductive ones), and a general decrease in work quality and output.
- Increased Absenteeism: For those working in traditional offices, ergonomic issues can lead to sick days. In a home office, it might mean working through pain, which is detrimental to health and certainly not sustainable.
- Eye Strain and Headaches: Improper monitor placement, glare, and poor lighting can lead to significant eye fatigue, blurred vision, and tension headaches, further impacting your ability to work effectively.
- Long-Term Health Consequences: Chronic pain and poor posture can have lasting effects on your skeletal structure, nervous system, and overall quality of life, extending far beyond your working hours.
By investing time and effort into optimizing your Home Office Ergonomics, you’re not just preventing problems; you’re actively promoting your health, comfort, and career longevity. Think of it as an investment in your most valuable asset: yourself.
Day 1-7: The Foundation – Your Chair and Desk
The first week of our 30-day challenge focuses on the cornerstone of any ergonomic setup: your chair and desk. These two elements dictate much of your posture and how your body interacts with your workspace. Getting them right is paramount to reducing strain.
Choosing the Right Ergonomic Chair
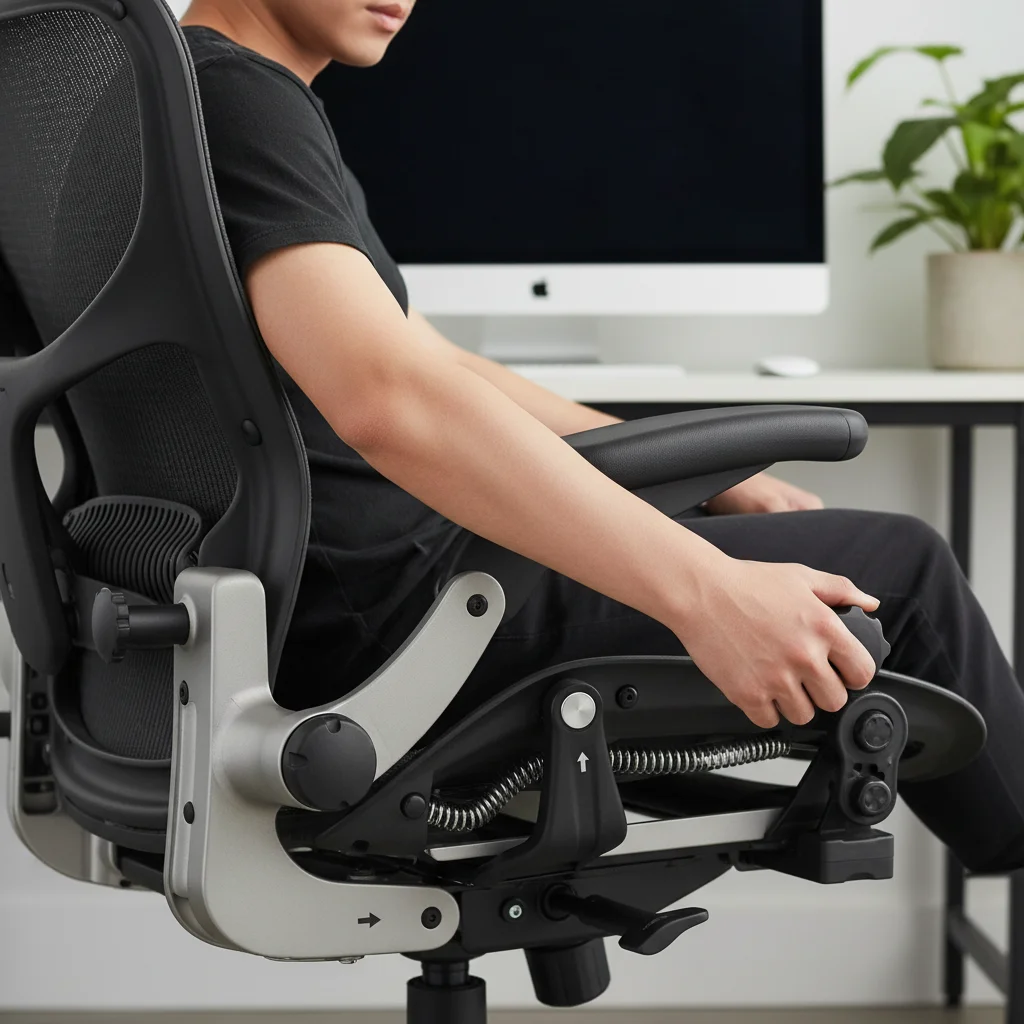
Your office chair is arguably the most critical component of your ergonomic setup. A good ergonomic chair provides adequate support for your spine, encourages proper posture, and is adjustable to fit your unique body shape. Here’s what to look for and how to adjust it:
- Lumbar Support: The chair should have a backrest that supports the natural curve of your lower spine. Many ergonomic chairs allow you to adjust the height and depth of the lumbar support.
- Seat Height: Your feet should be flat on the floor or on a footrest, with your knees at roughly a 90-degree angle. Your thighs should be parallel to the floor.
- Seat Depth: There should be about 2-4 inches between the edge of the seat and the back of your knees. This prevents pressure on the back of your legs.
- Armrests: Adjustable armrests are crucial. They should allow your arms to rest comfortably, keeping your shoulders relaxed and elbows at a 90-degree angle while typing.
- Swivel and Wheels: A chair that swivels easily and has wheels allows for greater mobility and reduces strain from reaching.
Actionable Step for Days 1-3: Assess and Adjust Your Chair. Spend time with your current chair. Can you adjust it to meet these criteria? If not, consider investing in an ergonomic chair. Even a basic ergonomic office chair can make a world of difference. If you can’t replace it immediately, use pillows or rolled-up towels for lumbar support and a footrest (even a sturdy box) if your feet don’t reach the floor.
Optimizing Your Desk Height and Setup
Once your chair is dialed in, your desk comes next. The ideal desk height allows you to maintain the correct posture established by your chair. For most people, this means a desk height that allows your forearms to be parallel to the floor when your elbows are at a 90-degree angle, with your shoulders relaxed.
- Fixed Desk: If you have a fixed-height desk, use your chair’s height adjustment to get into the correct position. If your chair is too high to get your feet flat, use a footrest.
- Standing Desk: A standing desk is an excellent investment for Home Office Ergonomics, allowing you to alternate between sitting and standing, which is highly beneficial for circulation and reducing prolonged static posture. When standing, your elbows should still be at a 90-degree angle, and your head should be neutral.
- Clear Workspace: Keep your desk free of clutter. Only essential items should be within easy reach to avoid unnecessary stretching and reaching.
Actionable Step for Days 4-7: Adjust Your Desk. Experiment with your desk height. If it’s too high, you might need to raise your chair and use a footrest. If it’s too low, consider desk risers or even a monitor stand to bring your screen to the correct height. Ensure your primary work tools (keyboard, mouse, monitor) are positioned directly in front of you.
Day 8-14: The Digital Interface – Monitor, Keyboard, and Mouse
With your foundation solid, the second week shifts focus to how you interact with your computer. Improper monitor placement and poor keyboard/mouse usage are common culprits for neck strain, eye fatigue, and wrist issues.
Perfecting Your Monitor Placement
Your monitor’s position significantly impacts your neck and eye health. Incorrect placement forces you to crane your neck or strain your eyes, leading to discomfort and long-term issues.
- Eye Level: The top of your monitor screen should be at or slightly below eye level. This allows you to view the entire screen without bending your neck up or down. If you wear bifocals, you might need to lower it slightly.
- Arm’s Length: Position your monitor about an arm’s length (20-30 inches) away from your eyes. Adjust this distance based on the size of your monitor and your visual comfort.
- Centering: If you use a single monitor, place it directly in front of you. If you use dual monitors, either center the primary monitor in front of you and place the secondary to its side, or center the space between the two monitors if you use both equally.
- Glare Reduction: Position your monitor to avoid glare from windows or overhead lighting. Use blinds or curtains, or consider an anti-glare screen protector.
Actionable Step for Days 8-10: Optimize Monitor Position. Use books, monitor risers, or an adjustable monitor arm to achieve the correct height and distance. Pay attention to glare and adjust your lighting or screen angle accordingly.
Keyboard and Mouse Ergonomics
Your keyboard and mouse are extensions of your hands. Incorrect positioning can lead to carpal tunnel syndrome, tendinitis, and general wrist and arm pain.
- Keyboard Position: Place your keyboard directly in front of you, close enough so that your elbows stay at a 90-degree angle and your shoulders are relaxed. Avoid resting your wrists on the desk while typing; instead, let them float above the keyboard. If you use a wrist rest, it should only be used during breaks, not while actively typing.
- Keyboard Type: Consider an ergonomic keyboard that promotes a more natural hand and wrist position. Split keyboards or those with a slight tenting can reduce ulnar deviation (bending of the wrist sideways).
- Mouse Placement: Your mouse should be as close to your keyboard as possible to avoid excessive reaching. Keep your wrist straight and use your whole arm to move the mouse, rather than just your wrist.
- Mouse Type: Explore ergonomic mice, such as vertical mice or trackballs, which can reduce strain on the wrist and forearm.
Actionable Step for Days 11-14: Refine Keyboard and Mouse Use. Practice typing and mousing with relaxed shoulders and straight wrists. If you’re experiencing discomfort, research and consider investing in ergonomic alternatives for your keyboard and mouse. Take short micro-breaks to stretch your wrists and fingers.
Day 15-21: Environmental Factors and Posture Maintenance
The third week expands our focus beyond the immediate workstation to include the surrounding environment and the crucial aspect of maintaining good posture throughout the day. These elements play a significant role in your overall comfort and energy levels.
Lighting and Visual Comfort
Good lighting is essential for preventing eye strain and headaches. The right lighting setup can significantly improve your visual comfort and focus.
- Ambient Lighting: Ensure your home office has adequate ambient lighting that is evenly distributed. Avoid working in a dimly lit room with a bright screen, as this creates a harsh contrast that strains your eyes.
- Task Lighting: A desk lamp can provide focused light for reading documents without causing glare on your screen. Position it so the light illuminates your work area without shining directly into your eyes or reflecting off your monitor.
- Natural Light: Maximize natural light where possible, as it’s beneficial for mood and alertness. However, be mindful of glare. Position your desk so windows are to your side, rather than directly in front or behind your monitor.
- Screen Brightness: Adjust your monitor’s brightness to match the ambient lighting in your room. Your screen shouldn’t be a glowing beacon in a dark room or washed out by bright light.
- Blue Light Filters: Consider using software blue light filters (like Night Shift on Mac or Night Light on Windows) or blue light blocking glasses, especially in the evenings, to reduce eye strain and improve sleep quality.
Actionable Step for Days 15-17: Optimize Lighting. Evaluate your current lighting. Add a desk lamp if needed, adjust blinds, and fine-tune your monitor’s brightness. Notice the difference in eye comfort.
Maintaining Healthy Posture
Even with the best ergonomic equipment, poor posture can negate all the benefits. It’s not enough to set up your station correctly; you must actively maintain good posture throughout the day. The key is awareness and conscious correction.
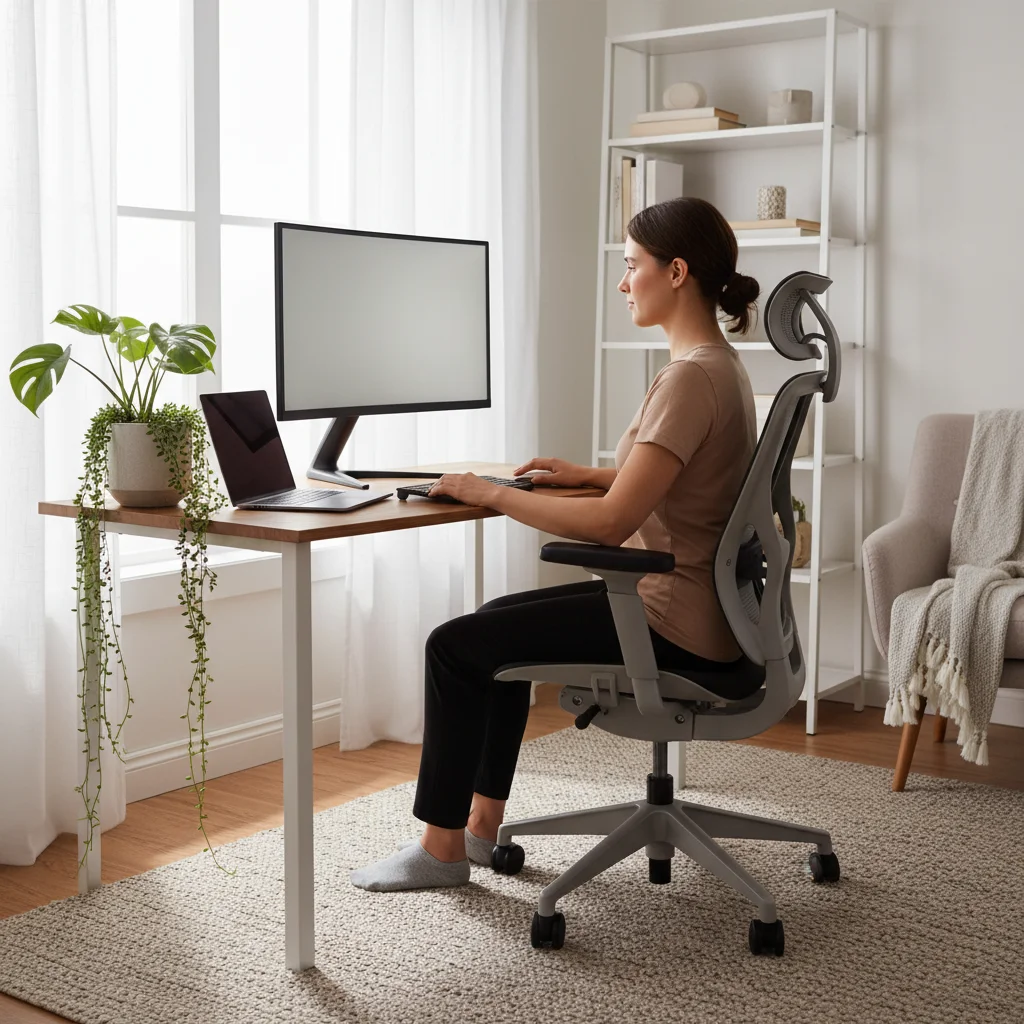
- Feet Flat: Keep your feet flat on the floor or a footrest.
- Knees at 90 Degrees: Ensure your knees are at approximately a 90-degree angle, with thighs parallel to the floor.
- Lower Back Support: Maintain the natural curve of your lower back with your chair’s lumbar support.
- Shoulders Relaxed: Keep your shoulders down and relaxed, not hunched up towards your ears.
- Elbows at 90 Degrees: Your elbows should be bent at a 90-degree angle, close to your body.
- Wrists Straight: Keep your wrists straight and neutral, avoiding bending them up, down, or sideways.
- Head Neutral: Your head should be balanced directly over your shoulders, not jutting forward. The top of your screen should be at eye level.
Actionable Step for Days 18-21: Posture Check-ins. Set a timer to go off every hour. When it rings, take a moment to consciously check your posture from head to toe and make any necessary adjustments. This consistent practice will build muscle memory.
Day 22-30: Movement, Breaks, and Advanced Strategies
The final week of our challenge brings together all the previous adjustments and introduces crucial elements of movement and advanced strategies to solidify your Home Office Ergonomics and ensure long-term well-being. Remember, even the most perfectly set up workstation is detrimental if you remain static in it for hours on end.
The Power of Movement and Breaks
Regular movement is perhaps the most overlooked aspect of workplace ergonomics. Our bodies are designed to move, not to sit or stand in one position for extended periods. Incorporating breaks and movement is vital for circulation, muscle health, and mental clarity.
- The 20-20-20 Rule for Eyes: Every 20 minutes, look at something 20 feet away for at least 20 seconds. This helps to relax your eye muscles and reduce digital eye strain.
- Short Breaks: Every 30-60 minutes, take a 5-minute break. Stand up, stretch, walk around, grab a glass of water. These micro-breaks prevent muscle stiffness and improve blood flow.
- Longer Breaks: Take a longer break (15-30 minutes) every 2-3 hours. Use this time to move more significantly – walk outside, do some light exercises, or prepare a healthy snack.
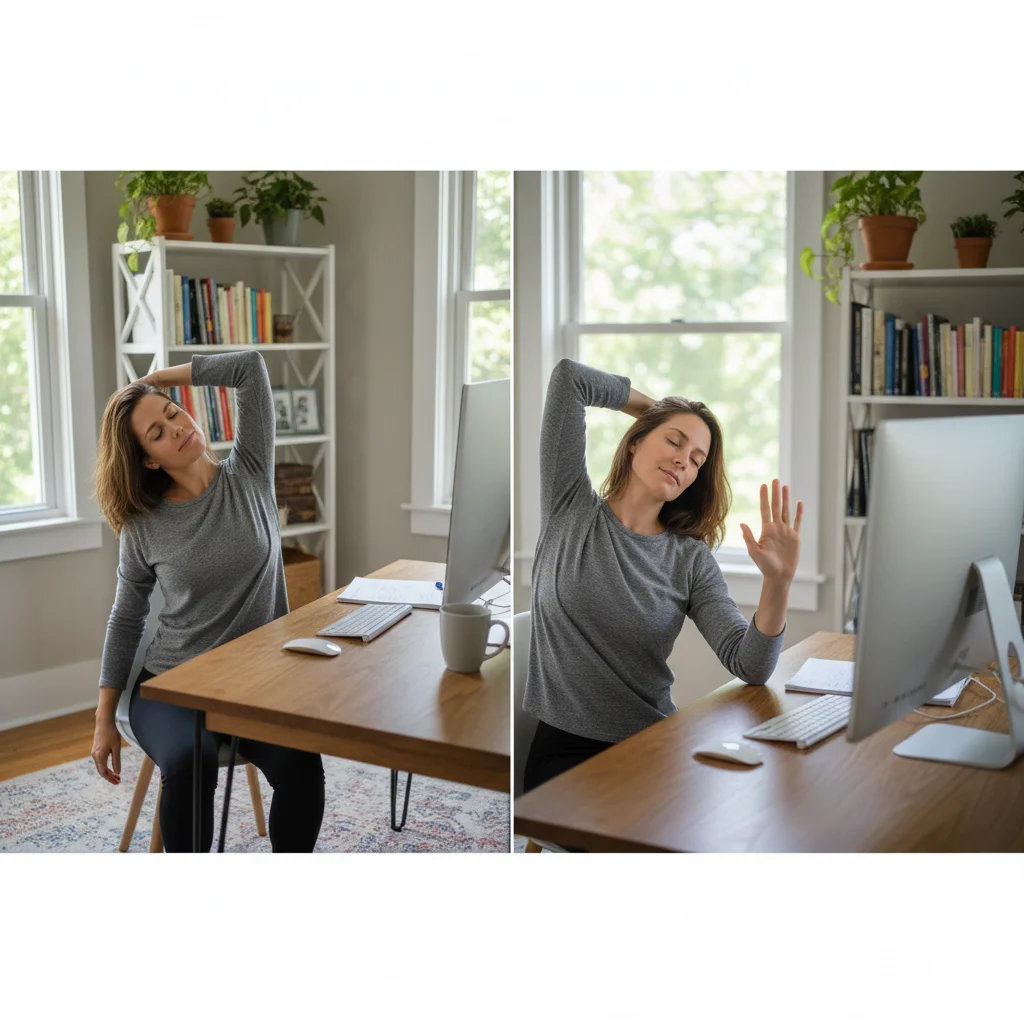
- Stretching: Incorporate simple desk stretches into your routine. Focus on your neck, shoulders, wrists, and back. There are many excellent resources online for office stretches.
- Vary Your Position: If you have a standing desk, alternate between sitting and standing throughout the day. Even if you don’t, try to find opportunities to work in different positions, perhaps on a laptop in a comfortable chair for a short period (though not for extended work).
Actionable Step for Days 22-25: Integrate Movement. Implement the 20-20-20 rule and schedule short breaks into your calendar. Get up and move every hour. Consciously stretch. Notice how these small changes impact your energy levels and reduce stiffness.
Advanced Ergonomic Considerations and Accessories
Once you’ve mastered the basics, you might consider some advanced tools and techniques to further refine your Home Office Ergonomics.
- Document Holder: If you frequently refer to physical documents, a document holder placed between your keyboard and monitor or next to your monitor at the same height can prevent neck twisting.
- Headset: For frequent phone calls, a headset keeps your hands free and prevents you from cradling the phone between your ear and shoulder, which is a major cause of neck pain.
- Ergonomic Mouse Pad with Wrist Support: While not for constant resting, a wrist rest built into a mouse pad can provide support during breaks and gentle cushioning.
- Footrest: If your feet don’t sit flat on the floor even after adjusting your chair, a dedicated ergonomic footrest can provide crucial support and proper leg positioning.
- Standing Mat: If you use a standing desk, an anti-fatigue mat can significantly reduce discomfort in your feet, legs, and back during prolonged standing periods.
- Voice Recognition Software: For those with severe wrist or hand issues, voice recognition software can be a game-changer, reducing the need for extensive typing.
- Regular Self-Assessment: Continuously listen to your body. If you feel discomfort, identify the cause and make adjustments. Ergonomics is an ongoing process, not a one-time setup.
Actionable Step for Days 26-30: Refine and Review. Consider any of these advanced accessories that might benefit your specific needs. Most importantly, review your entire setup. Are there any lingering areas of discomfort? Re-evaluate your chair, desk, monitor, and input devices. Commit to making ergonomics a continuous part of your daily routine.
Measuring Your Progress: Reducing Strain by 20% in 30 Days
Our goal was to reduce strain by 20% in 30 days. How do you measure this? While there’s no precise scientific instrument for home use, you can use a subjective pain/discomfort scale and consistent self-reflection.
Before You Started (Day 1): Rate your typical daily discomfort on a scale of 1-10 (1 being no pain, 10 being severe pain) in areas like your neck, shoulders, back, wrists, and eyes. Note down specific symptoms (e.g., ‘dull ache in lower back by 3 PM,’ ‘tightness in neck after 2 hours’).
After 30 Days: Re-evaluate your discomfort levels. Are the aches less intense (e.g., a 6 is now a 4, representing a ~33% reduction)? Do they start later in the day? Are they less frequent? Are you experiencing fewer headaches or less eye strain? A 20% reduction would mean a noticeable, tangible improvement in your daily comfort and overall well-being. For example, if your average discomfort was a 5, aiming for a 4 would be a 20% reduction.
Beyond numerical ratings, consider qualitative improvements:
- Do you feel more energetic at the end of the workday?
- Are you more focused and less distracted by physical discomfort?
- Do you find yourself less stiff or sore when you wake up in the morning?
- Is your mood generally better while working?
These qualitative improvements are often just as, if not more, important than a numerical decrease in pain. They signify a genuine enhancement in your quality of life and work experience, directly attributable to prioritizing your Home Office Ergonomics.
Conclusion: Your Journey to a Healthier Home Office
Optimizing your Home Office Ergonomics is not a luxury; it’s a necessity for anyone spending significant time working remotely. By systematically addressing your chair, desk, monitor, input devices, lighting, and movement habits over 30 days, you can achieve a remarkable reduction in physical strain and a significant boost in comfort and productivity.
Remember, ergonomics is an ongoing process of adjustment and awareness. Your body’s needs may change, and your setup might require tweaks over time. The key is to remain mindful of your posture, listen to your body, and proactively make changes to maintain a healthy and supportive workspace. By investing in your ergonomic setup, you’re investing in your long-term health, happiness, and professional success. Take these strategies, apply them diligently, and enjoy the profound benefits of a truly ergonomic home office.